RiNo Denver Double Duplex: 4-Unit Gut Remodel

Two older brick duplexes in Denver’s RiNo neighborhood — four units in all — taken down to the brick and joists and rebuilt from the inside out by Gribbons Group. This page walks through the project in order: where it started, what the build looked like, and how it finished.

Planning something similar? Call (720) 223-9003 or request a free estimate.

Before and After

Three rooms, before and after: same spaces, completely rebuilt. In several rooms, the old plaster came off to uncover the original brick, which stayed exposed in the finished units.

From our RiNo Denver double duplex, a 4-unit gut remodel by Gribbons Group.

Kitchen
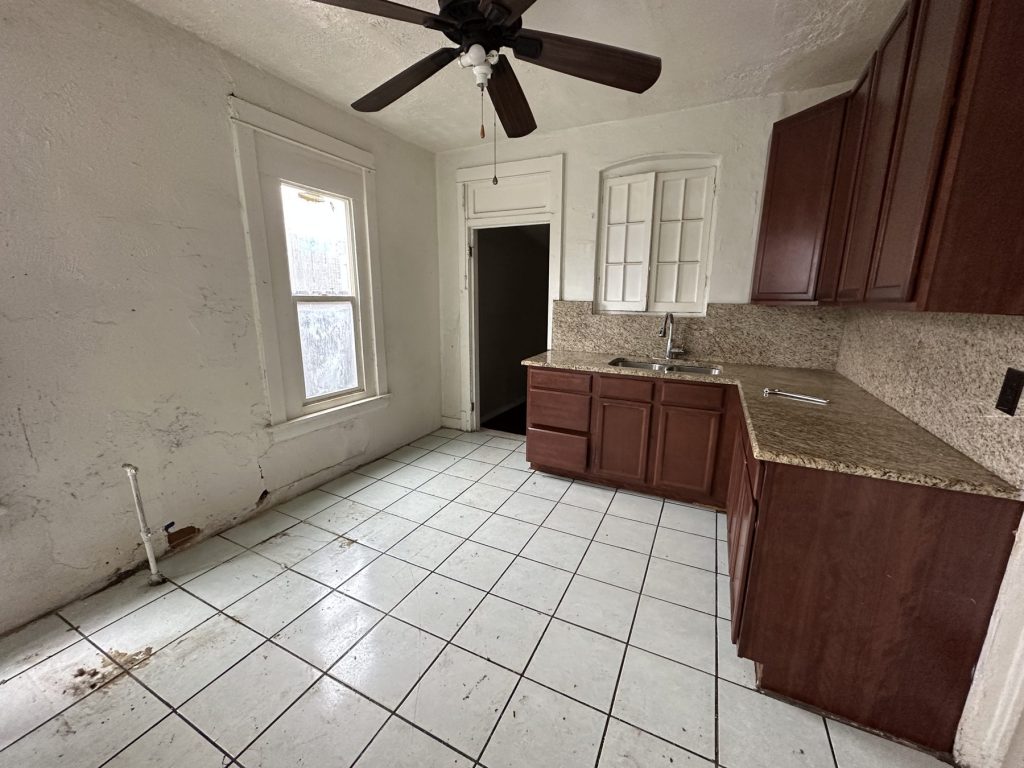
Kitchen before remodeling with dated cherry cabinets, granite counters, worn white floor tile, a ceiling fan, and damaged plaster walls
Before: the original kitchen
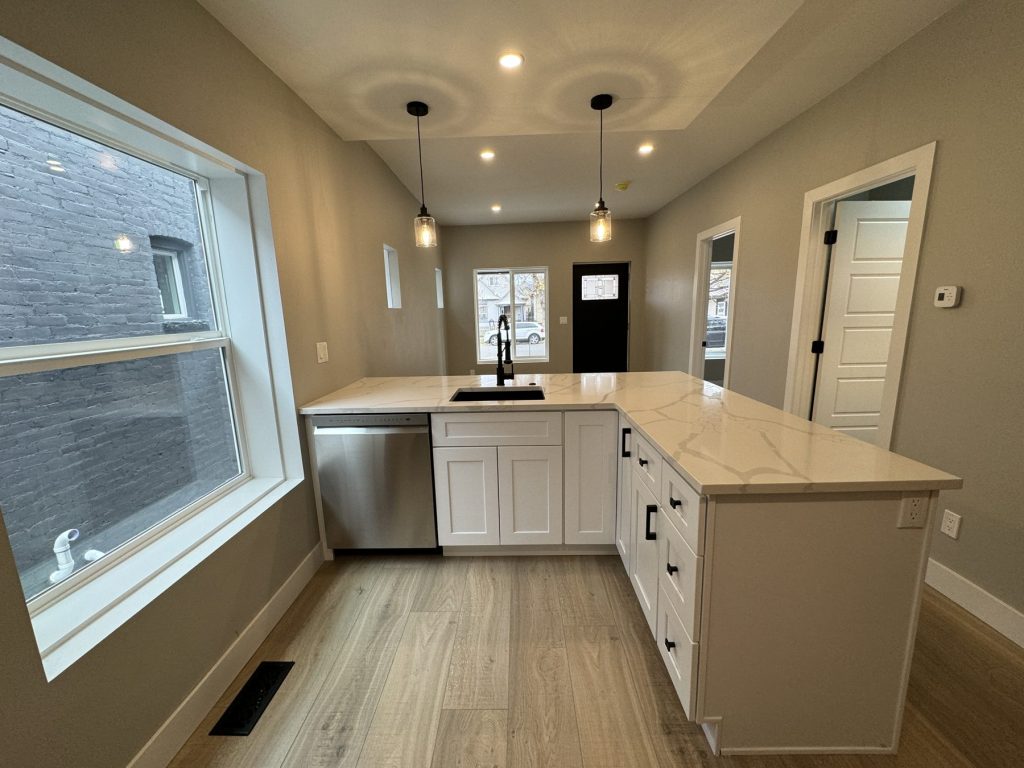
Remodeled kitchen with white shaker cabinets, a quartz-topped peninsula with undermount sink and black faucet, stainless dishwasher, pendant lights, and wood-look plank flooring
After: rebuilt with a quartz peninsula

Living room to open living and kitchen
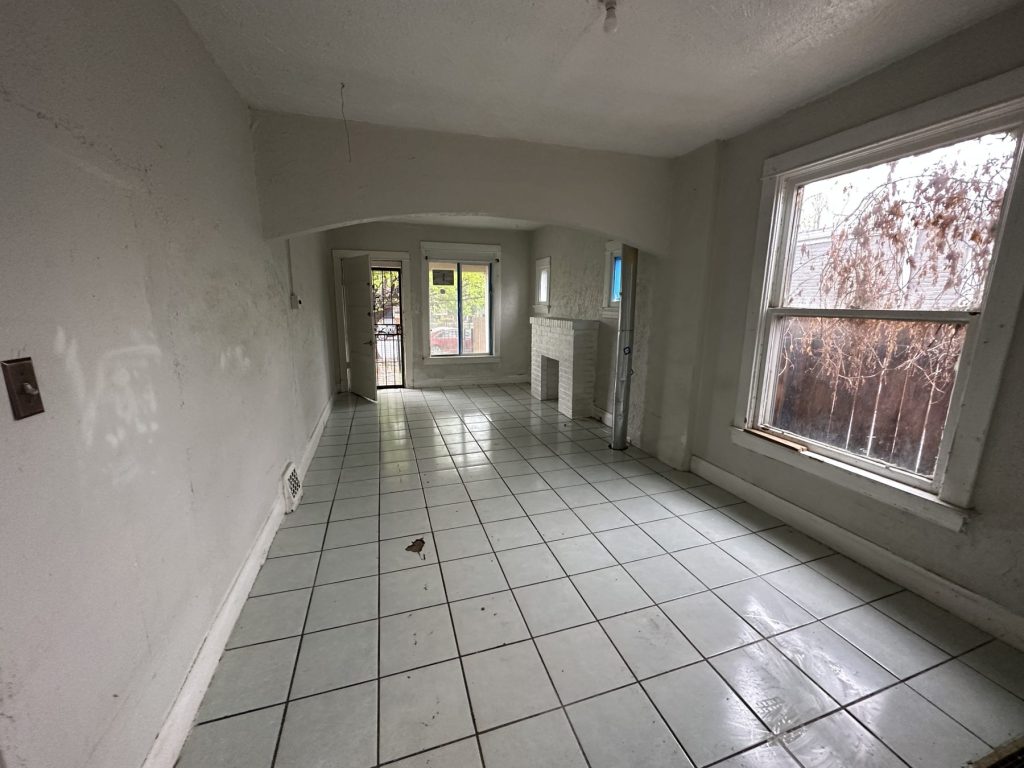
Living room before remodeling with white ceramic floor tile, stained walls, an arched opening, and a painted brick fireplace
Before: the original living room
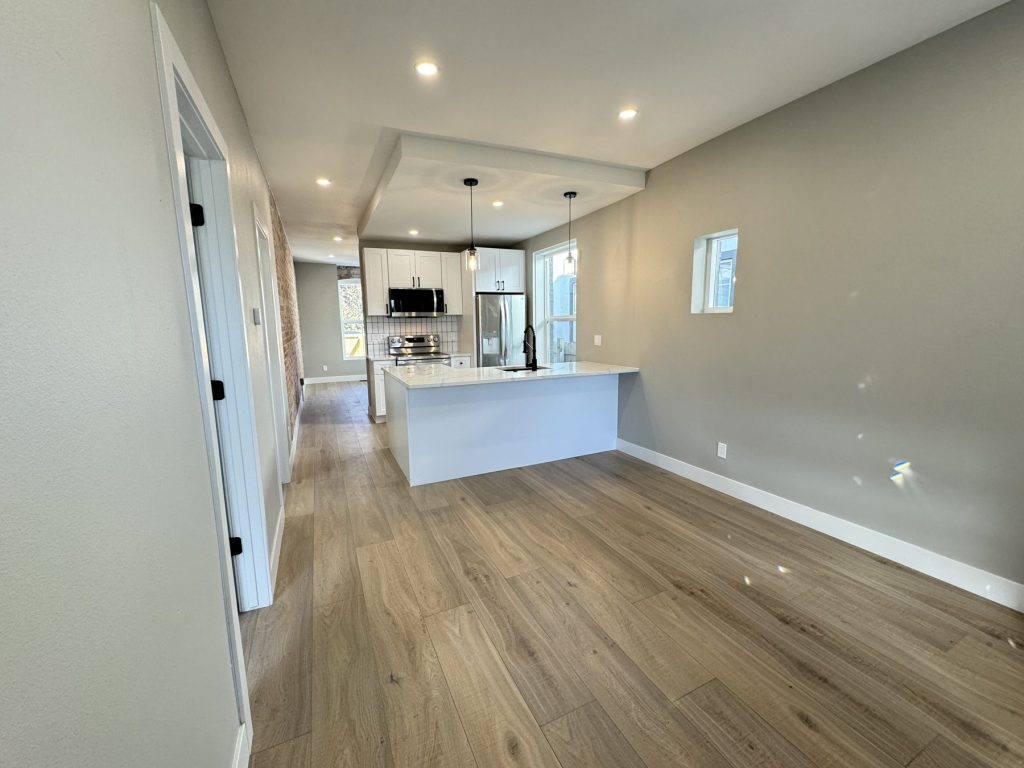
Open living area after remodeling with wood-look plank flooring, recessed lighting, gray walls, and a white kitchen with quartz peninsula and pendant lights beyond
After: an open living room and kitchen

Bathroom

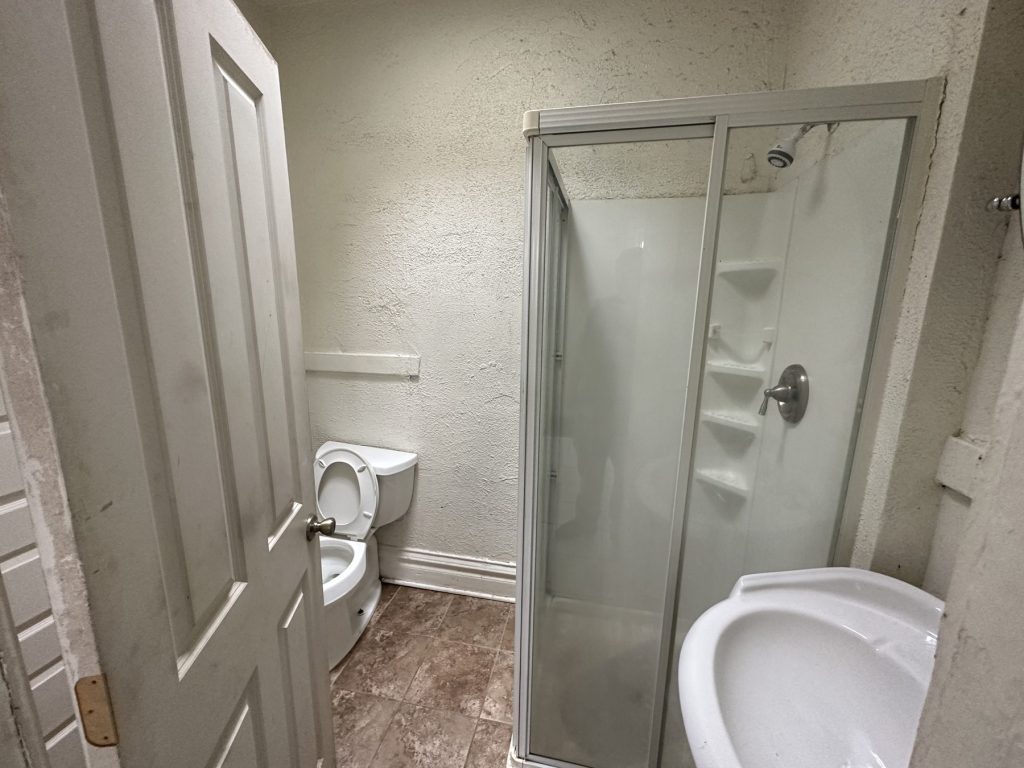
Small bathroom before remodeling with a corner shower stall, pedestal sink, textured walls, and brown vinyl floor tile
Before: the original bathroom
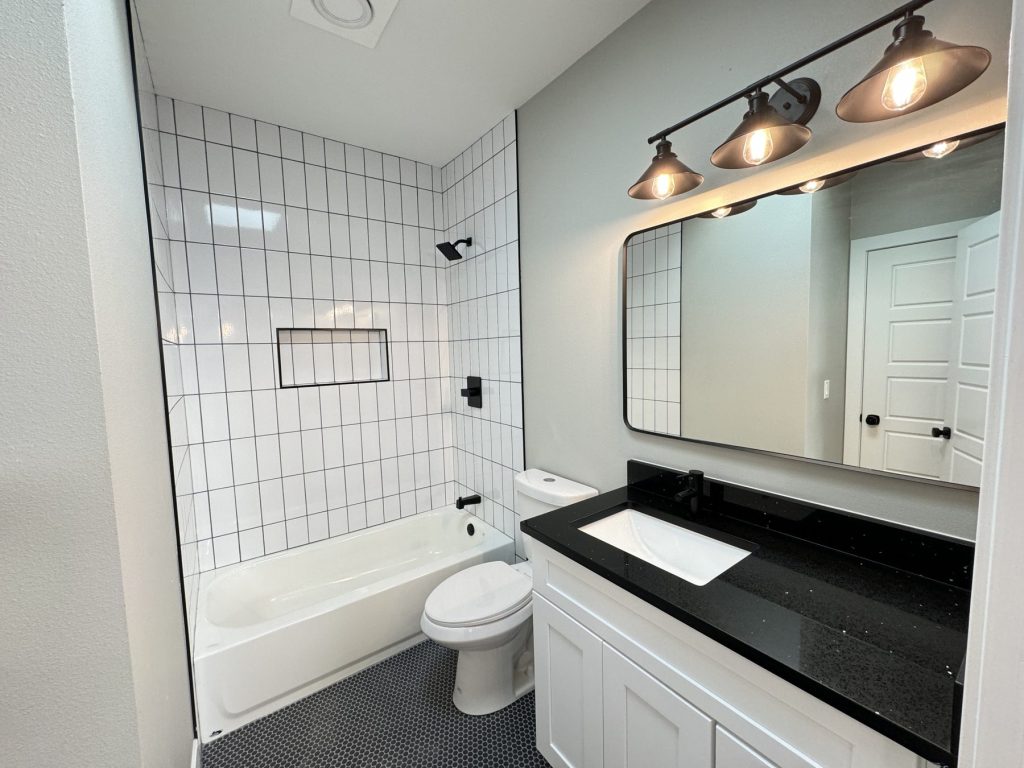
Remodeled bathroom with a white vanity and black quartz top, large mirror and black light bar with copper shades, tub with white vertical subway tile surround and niche, and black hex floor tile
After: new tub, tile, and vanity

The Scope: A Complete Gut and Rebuild

Every unit was stripped to the structure and rebuilt. The work visible in the photos on this page includes:

  • Demolition down to the original brick walls and ceiling joists.
  • Framing for new wall layouts and soffit and ceiling details.
  • Electrical, including a new panel and full rough-in wiring.
  • Plumbing rough-in for new kitchens and bathrooms.
  • Insulation in exterior walls.
  • Drywall hung and finished, including ceiling soffit details.
  • Kitchens with white cabinets, quartz-topped peninsulas, and stainless appliances.
  • Bathrooms with tiled tub surrounds and niches, new vanities and lighting, and mosaic tile floors.
  • Flooring, trim, and paint throughout, with original brick left exposed as a feature wall and around arched openings.
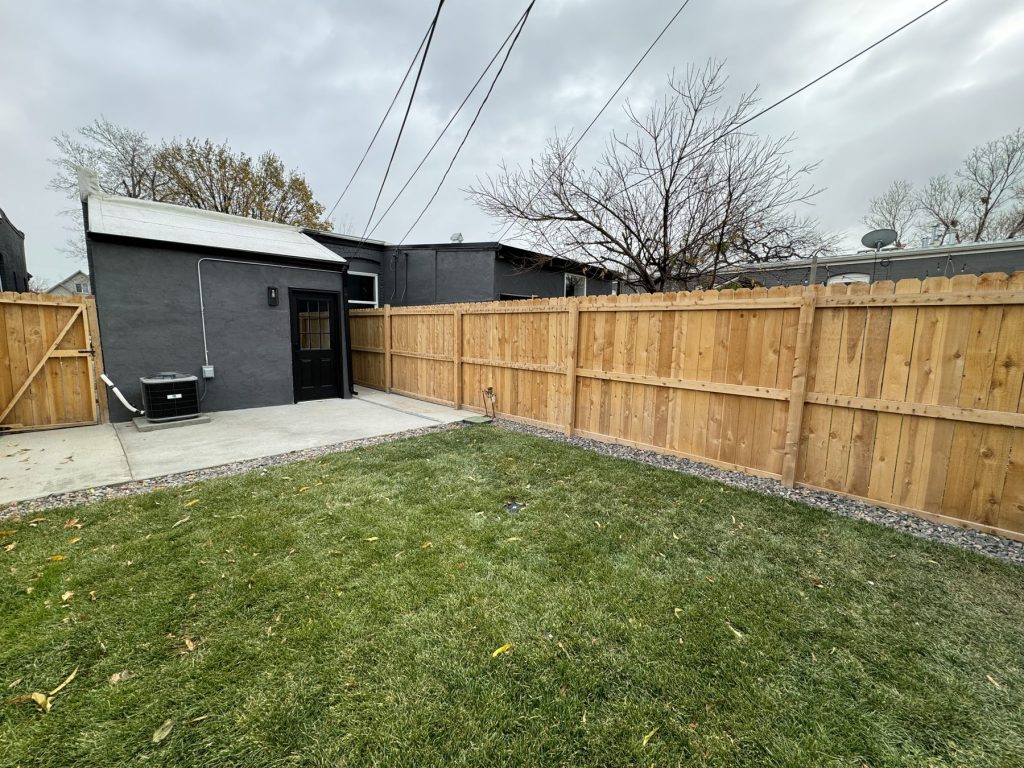
  • Exterior and yard, including a new privacy fence, a concrete patio, and a new lawn.

Where It Started

Demolition took the interiors back to brick and joists, so every system could be replaced and the floor plans laid out fresh.
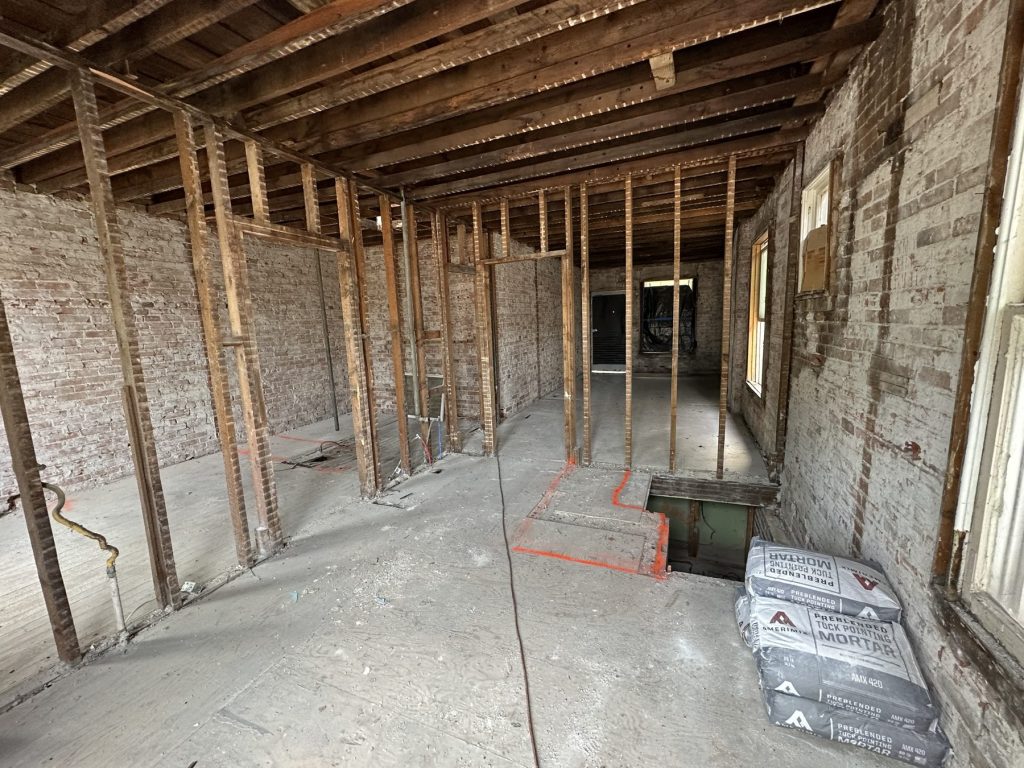
Interior fully gutted to the brick walls, old studs and ceiling joists exposed, layout marked in orange paint on the subfloor, and bags of mortar staged by the wall
Demo: taken back to brick and joists

During the Build

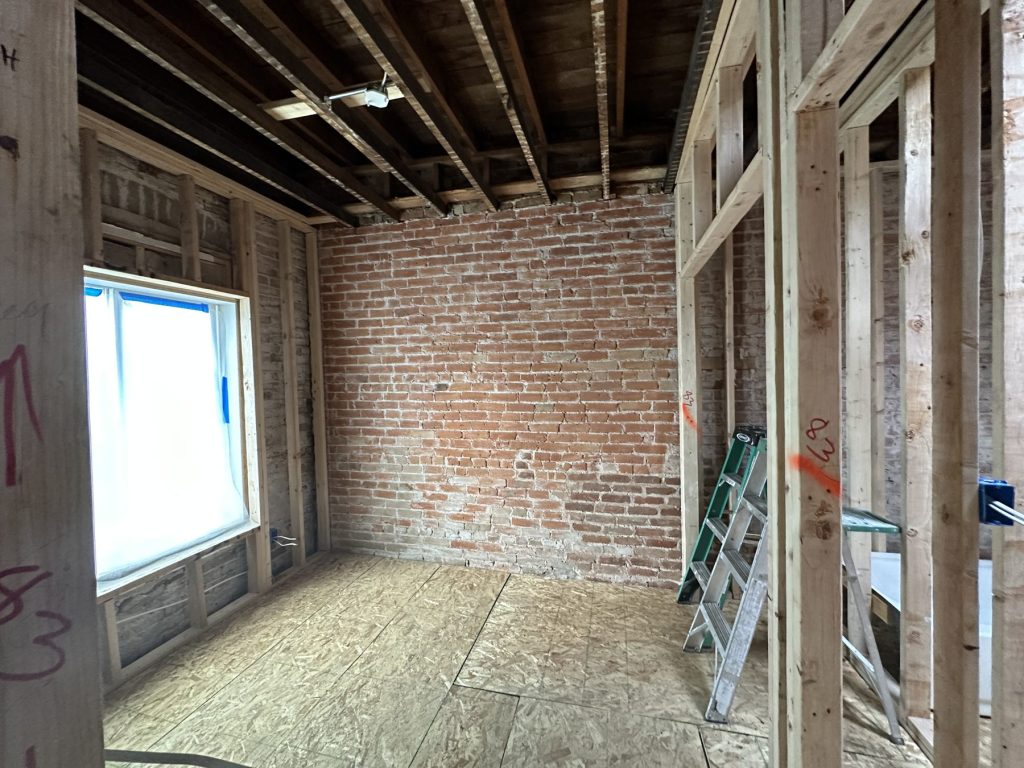
With the interiors open, the new layouts were framed, then electrical and plumbing were roughed in and inspected before insulation and drywall closed the walls.
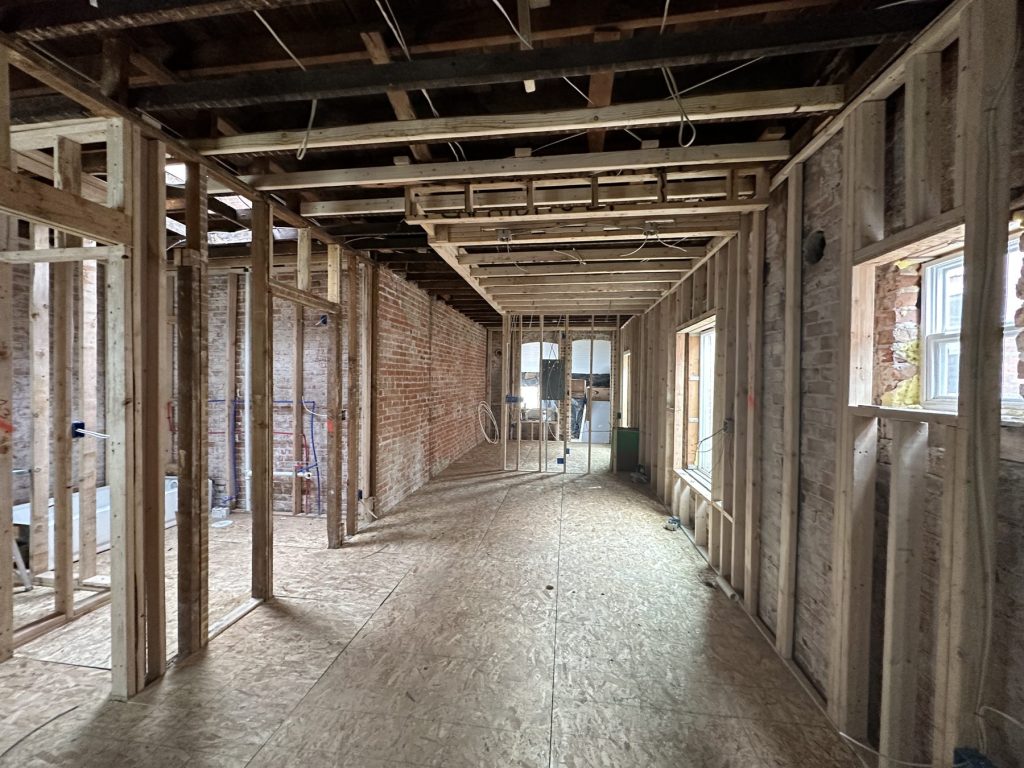
Open interior mid-remodel with new wood stud walls framed along exposed brick, open ceiling joists, and OSB subfloor
Framing: new walls inside the original brick
Bedroom mid-remodel with new stud framing around a window, an exposed red brick wall, open ceiling joists, and a new OSB subfloor
Framing around a bedroom window
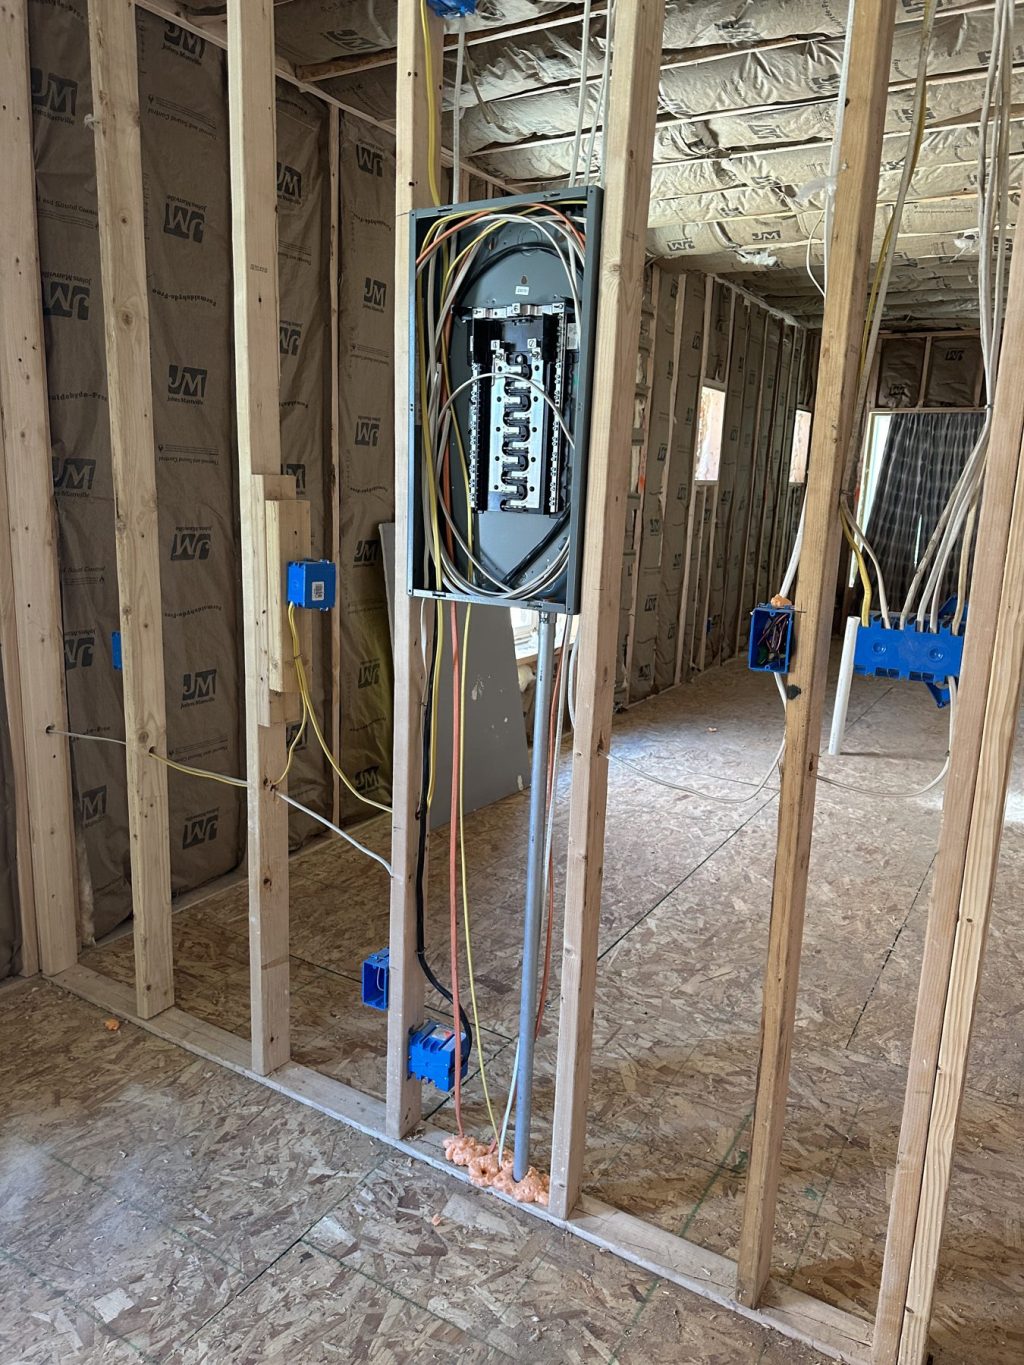
New electrical panel mounted between wall studs with circuits roughed in, blue outlet boxes on the framing, and insulated exterior walls
Electrical: new panel and rough wiring
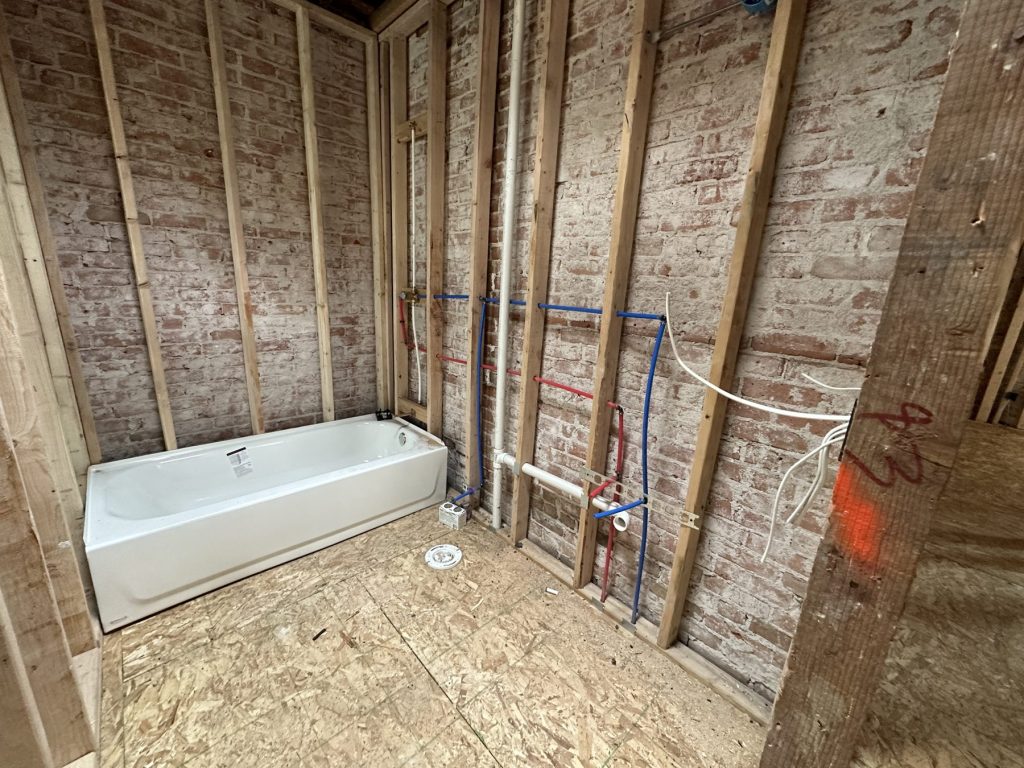
Bathroom under construction with a new white bathtub set, wood stud framing over exposed brick, and red and blue PEX supply lines and PVC drain roughed in
Rough plumbing set against the original brick
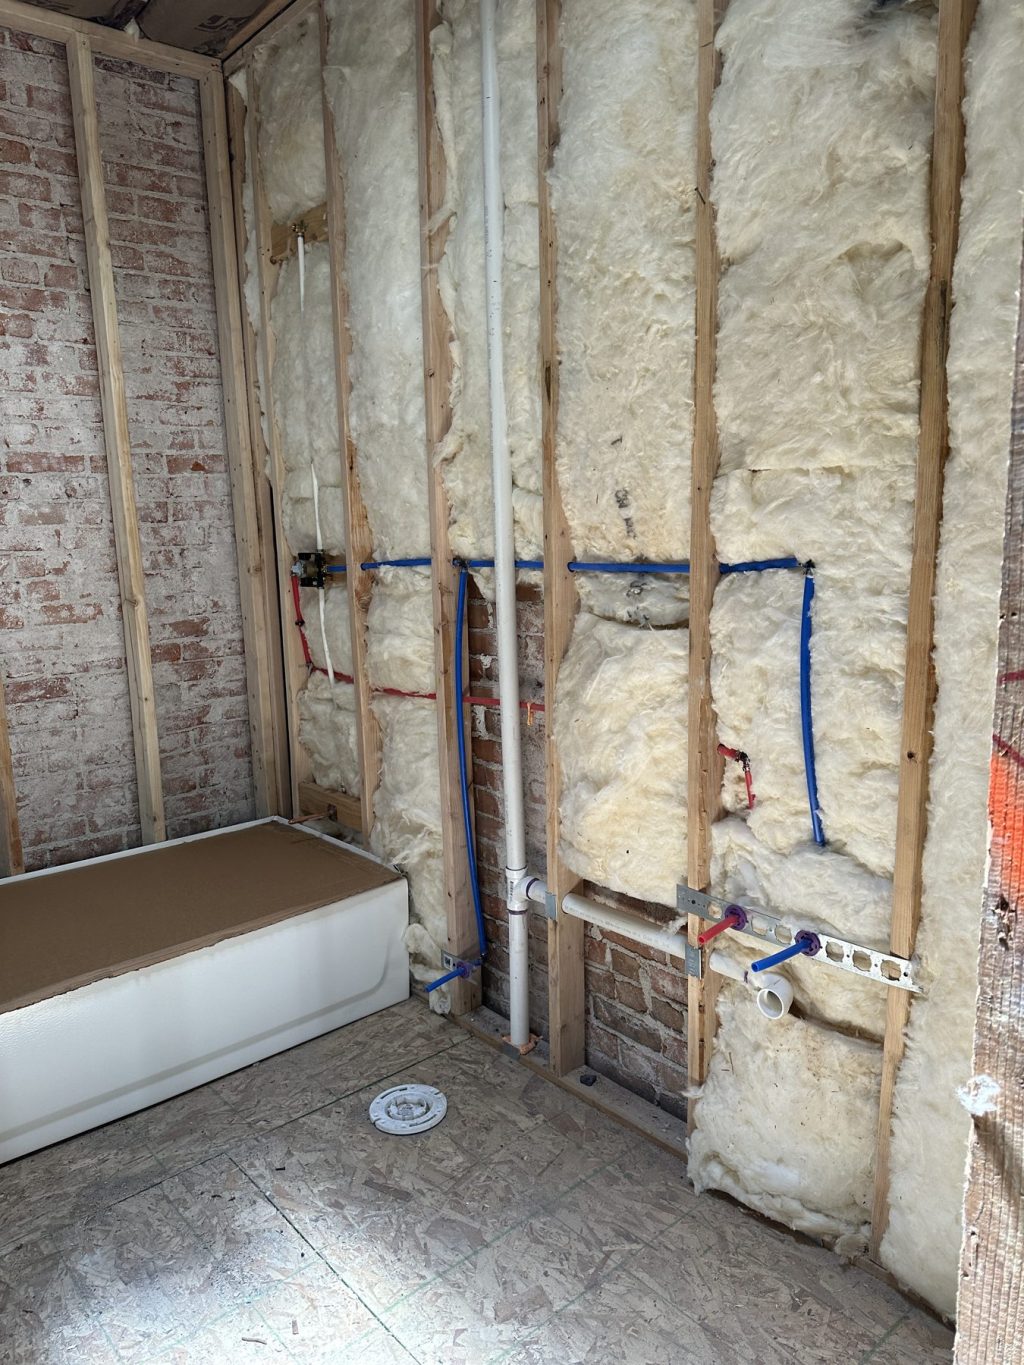
Bathroom wall framing filled with batt insulation, with PEX water lines, shower valve, and PVC drain and vent roughed in beside a protected bathtub
Rough plumbing and insulation before drywall
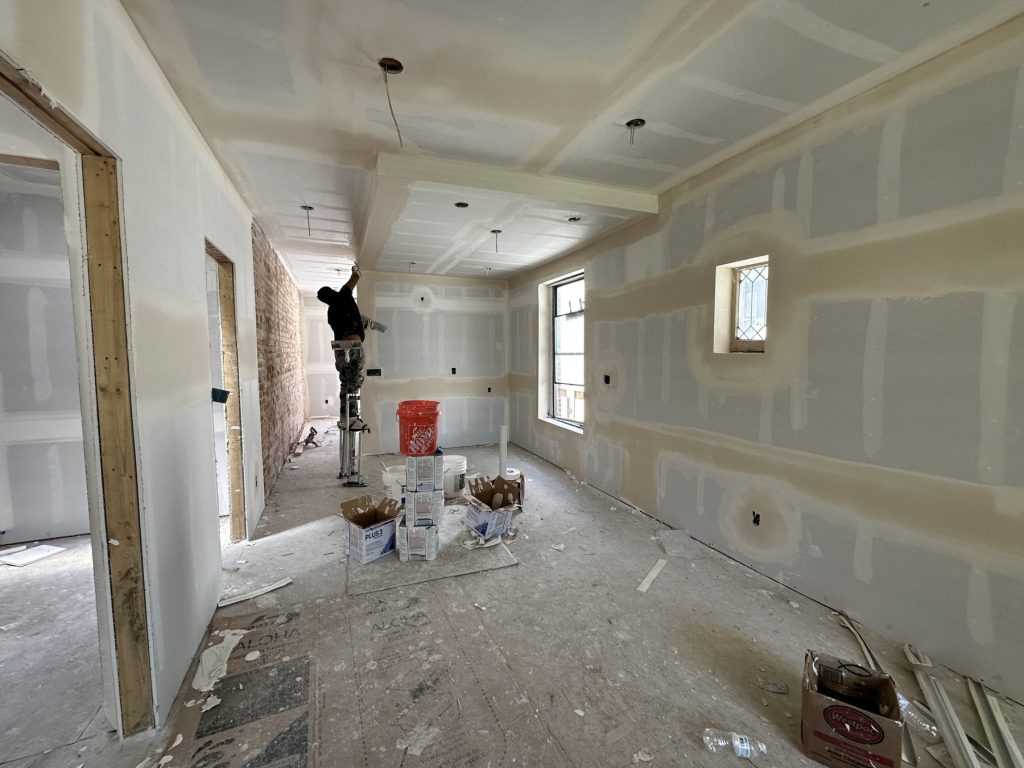
Drywall taping and mudding in progress in a long room with a tray ceiling with soffits, recessed light openings, and an exposed brick wall at the far end
Drywall: taping and mudding before paint

This is the same sequence we follow on every remodel. Our process page explains each stage.

The Finished Units

The finished units pair clean, modern kitchens and baths with the original brick that gives these buildings their character.
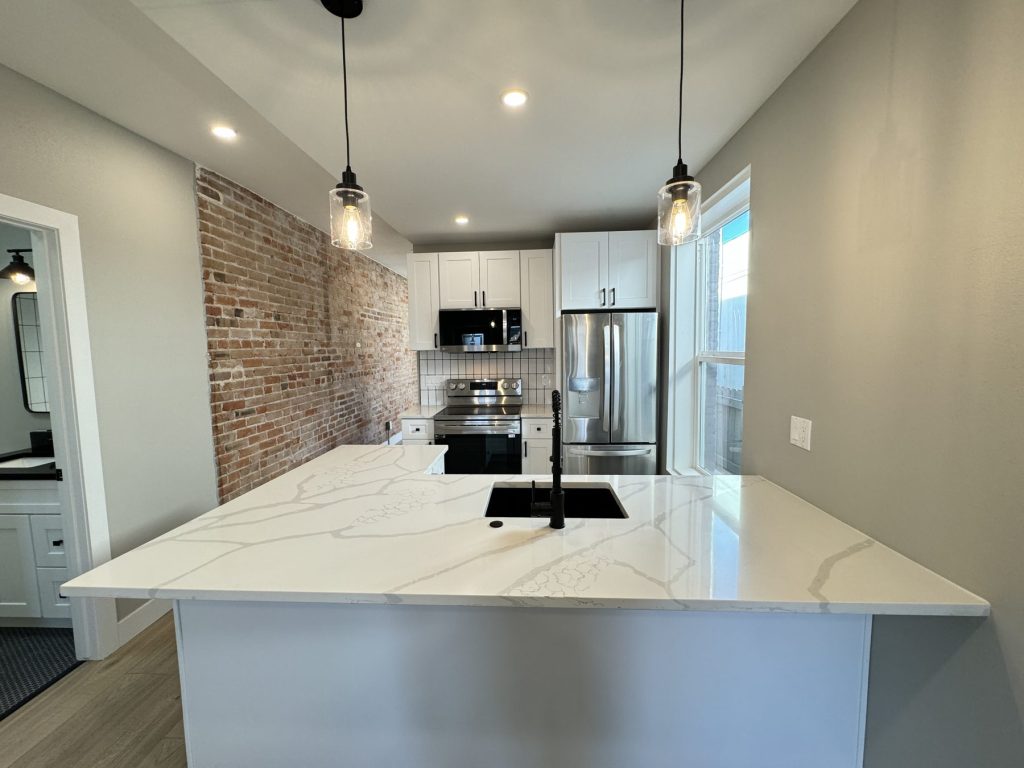
Remodeled kitchen seen straight on: large quartz peninsula with black undermount sink, white shaker cabinets, stainless range and refrigerator, subway tile backsplash, and an exposed brick wall
The finished kitchen, with the original brick wall
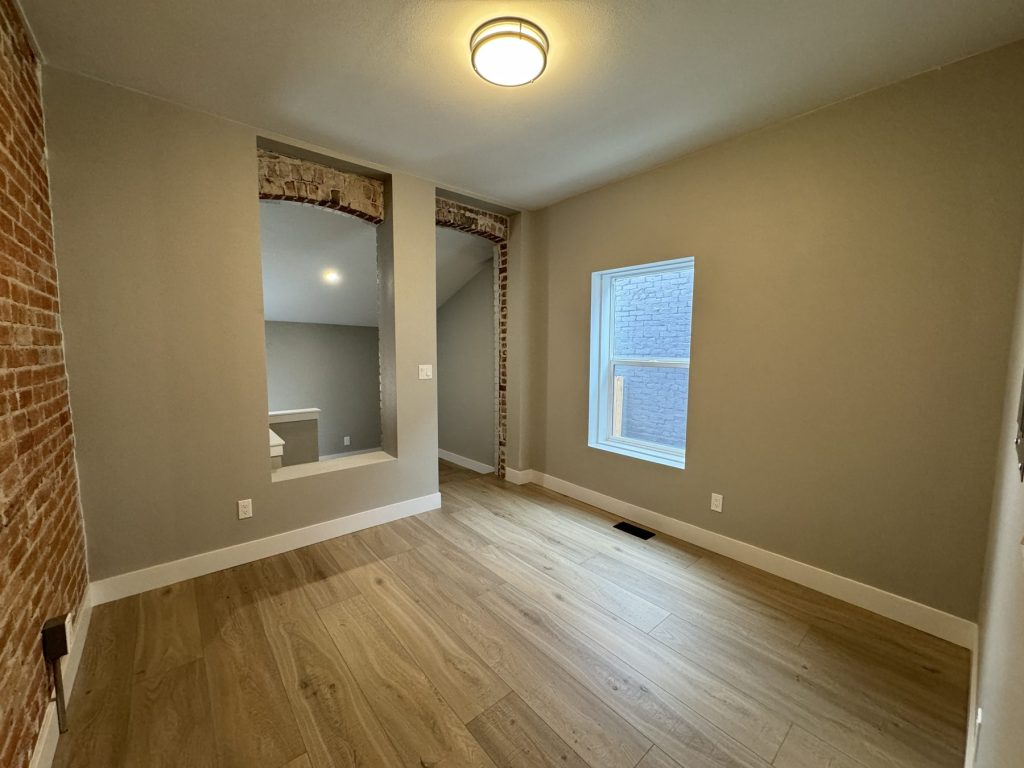
Finished room with two arched openings trimmed in original exposed brick, an exposed brick side wall, new window, wood-look plank flooring, and white baseboards
Original brick arches, left exposed
Backyard with a new cedar privacy fence and gate, concrete patio, gravel border, fresh lawn, and dark-painted exterior walls
New fence, patio, and lawn

Planning a Remodel?

Whether it’s one room or a whole house, we handle the design, permits, trades, and inspections under one contract. See our kitchen remodel and bathroom remodel pages, or learn how we work. More of our work: a kitchen before and after, basement finishing in Denver neighborhoods, and garage builds.

Call (720) 223-9003 or request a free estimate.